Monday, January 23, 2017

Installing OS X (10.11 - El Capitan) in iMac or Mac book 2007, 2008, 2009

Scenario 

I got the task to install a fresh OS X (El Capitan) to friend in an iMac 2007 and it's a surprise how can be done. Before I start I assume that you want a fresh installation so make a backup of your information in an external device (or the cloud with dropbox) before start. Some Macs from 2009 and up have the option of "Command + R" method, but in this case we assume that it does not work.

Requirements

  1. You have a "OS X El Capitan.dmg" downloaded. (look for them in torrent.)
  2. You have a USB drive (USB flash drive) of at least 8 GB of capacity.
  3. All this process will happen in a OS X environment. (No Windows please.)

Happy path

So here are the happy steps of doing it:
  1. Create an install boot drive using the USB drive and the "OS X El Capitan.dmg".
  2. Boot to recovery mode in the USB drive and wipe the hard drive (ALL DATA IN HARD DRIVE WILL BE LOST, DO BACKUP!!!)
  3. Install "OS X El Capitan" and have a beer!

Step 1

  1. Double click on "OS X El Capitan.dmg" to mount this in "Finder". Once mount and open, it should show a name like this "OS X El Capitan". Copy this to your "Documents" folder (Command + C and Command + V, or simply grab the icon and drop it in the "Documents").
  2. Insert the USB drive to your computer and rename it like "INSTALL".
  3. Open the terminal and do this command:

    sudo Documents/OS\ X\ El\ Capitan.app/Contents/Resources/createinstallmedia --volume /Volumes/INSTALL --applicationpath Documents/OS\ X\ El\ Capitan.app
  4. This command will ask you for your password in order to proceed. It will ask you to confirm with "Y" for the actions that will happen in the USB drive. Once it start it should take from 15 to 30 minutes or until it finishes coping all installation files to the USB drive and making it able to boot.

Step 2

  1. Restart your computer and once you hear the sound that is starting press and keep press for a while "Option (Alt)" key until it shows a menu for select different drives. Select the one that says something like "OS X 10.11 install drive", and click in the below arrow.
  2. Wait until it boots up a screen of different options. Now click on the top bar on the screen that says "Utilities", and then "Disk Utility...". Once open this menu, select the first "Internal" drive (at the left), and then click on "Erase" and on the confirmation dialog enter in the highlighted input name "Macintosh" and then  click "Erase". Wait until it finish doing this process. Now go to the top bar in the screen and click on "Disk Utility" and the "Quit Disk Utility".
  3. Now it should take you to the same screen when it boot up.

Step 3

  1. We are ready to install but this step is the most critical one because of different errors that can happen so lets do it in way that whatever error happen we can keep trying to install.
  2.  Click on the top bar on the screen that says "Utilities", and then "Terminal ...".  Once the terminal is open do this command:

    installer -verbose -pkg /Volumes/Mac\ OS\ X\ Install\ DVD/Packages/OSInstall.mpkg -target /Volumes/Macintosh
  3. The installation happens in text mode, so be patient until it finishes. At this time 2 types of error might happen:

    A. "This copy of the Install OS X El Capitan application can't be verified. It may have been corrupted or tampered with during downloading."

    B. "OS X could not be installed on your computer. No package were eligible for install. Contact the software manufacturer for assistance. Quit the installer to restart your computer and try again. Restart"

    Both errors have the same solution and is very easy (and very crazy). So whenever one of this errors happens the installation stops. So we need to change the date of the computer to a year when  "OS X El Capitan" were released (don't ask me why), just type something like this:

    date 101407002015
    or  
    date 101407002016
    after that type command

    date
    to check that the date is in 2015 or in the second case 2016.

    and then try again the installer command in step 2 in the terminal (installer -verbose etc...) and wait until the installation finishes (if the hard drive is not a SSD it will take some time, just wait until no more ### symbols).
  4. Now click on the top bar on the screen on the apple symbol and restart the computer. Once you hear the sound that is starting DISCONNECT THE USB DRIVE and have your beer in your hand to configure your fresh Mac or iMac.

Wednesday, November 9, 2016

Setting up Docker (Docker Compose) in Ubuntu for Nginx, PHP and MySQL.

Intro

Every time we start a new web project there is always the need to setup all the necessary tools. Some of these tools are:

  1. Web sever (serve requests from client)
  2. Programming Language (to handle the logic of the application)
  3. Database (to store data)

 In this case I am going to be focus in a web app using Nginx as my server, PHP as my back-end programming language and MySQL as my database.

Here comes the questions:

  • Is it better to have the web server and database in my personal computer as a service running?
  • How can I keep separated the different versions of PHP configurations from others projects?
  • How can I have separated DB running for this project and other projects?
  • How can other developer (or tester) run the same environment as I have with out going through all the process of installation?
Well, lets try to solve all that by using docker. But what is that?

According to www.docker.com/what-docker and I resume:

"Docker containers wrap a piece of software in a complete filesystem that contains everything needed to run... This guarantees that the software will always run the same, regardless of its environment."

So basically is have containers of the tools you'll need. These containers can be updated or modified individually and the union of all them is your working environment. To have a more general idea please read docker documentation.

so this is the goal of today: 
  • Have per project a different configuration of docker settings.

Show me goods

Requirements:

Create a folder that will hold all ours projects. I'll call this "Code".

~: mkdir Code

Create the first project called "Mouse" and lets jump in it.

~: mkdir Code/Mouse
~: cd Code/Mouse

Create a file called "docker-compose.yaml". This file will have the configuration to handle all the containers in this specific project.

~/Code/Mouse: touch docker-compose.yaml

Open the file and add these lines and save the file.

nginx:
    image: nginx:latest
    ports:
        - 80:80

Now lets run this
~/Code/Mouse: docker-compose up -d

So whats going to happen is that docker-compose will download the latest version of the container nginx and will open to our port 80.


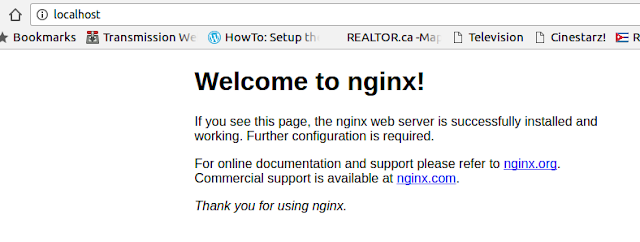
Now in your browser to http://localhost and lets see Nginx up and running.


Lets continue to add PHP to this docker-compose configuration. First we are going to create two separated folders to have specific configurations to ours containers. This happens because we need to communicate Nginx with PHP and for that we will create custom containers based on the downloaded containers

To be safe lets stop the container

~/Code/Mouse: docker-compose down

First we will create a folder called "nginx" and in here we will create 2 files. One will have a nginx configuration (default.conf) and the other the configuration to our custom nginx container (Dockerfile)
~/Code/Mouse: mkdir nginx
~/Code/Mouse: cd nginx~/Code/Mouse/nginx: touch default.conf
~/Code/Mouse/nginx: touch Dockerfile

Now add this code to default.conf

server {
    listen 80 default_server;
    root /var/www/html;
    index index.html index.php;

    charset utf-8;

    location / {
        try_files $uri $uri/ /index.php?$query_string;
    }

    location = /favicon.ico { access_log off; log_not_found off; }
    location = /robots.txt  { access_log off; log_not_found off; }

    access_log off;
    error_log  /var/log/nginx/error.log error;

    sendfile off;

    client_max_body_size 100m;

    location ~ \.php$ {
        fastcgi_split_path_info ^(.+\.php)(/.+)$;
        fastcgi_pass php:9000;
        fastcgi_index index.php;
        include fastcgi_params;
        fastcgi_param SCRIPT_FILENAME $document_root$fastcgi_script_name;
        fastcgi_intercept_errors off;
        fastcgi_buffer_size 16k;
        fastcgi_buffers 4 16k;
    }

    location ~ /\.ht {
        deny all;
    }
}

and this to Dockerfile


FROM nginx:latest

COPY ./default.conf /etc/nginx/conf.d/default.conf

Ok, lets create the folder for PHP

~/Code/Mouse/nginx: cd ..
~/Code/Mouse: mkdir php
~/Code/Mouse: cd php
~/Code/Mouse/php: touch Dockerfile

Lets edit that php Dockerfile

FROM php:7.0-fpm

Ok, lets get back to our docker-compose.yaml and lets reflect the changes:

nginx:
    build: ./nginx/
    ports:
        - 80:80
    links:
        - php
    volumes:
        - .:/var/www/html

php:
    build: ./php/
    expose:
        - 9000
    volumes:
        - .:/var/www/html

Notice links: in the configuration will tell that nginx needs to link with php container

We have to create the new custom containers and for that lets do

~/Code/Mouse/php: cd ..
~/Code/Mouse/php: docker-compose build

Remember this: you only will need to run docker-compose build if you make changes in the Dockerfile.

Notice that because we already downloaded the container of nginx the custom nginx doesn't to download that again. Lets see how the output should look like:


Ok lets run it
~/Code/Mouse: docker-compose up -d

and go to http://localhost. Oh my! a big 403 error. 


So what happened is that we set in the docker-compose.yaml a new setting called volumes. This maps a folder in our local computer in the container, in this case

.:/var/www/html

we mapped the folder where the project is (.) to the document root 
in the container /var/www/html. Take a look in nginx/default.conf de declared that the document root will be in /var/www/html.

So lets add a index.php in our Mouse folder 

~/Code/Mouse: touch index.php

with content 

<?php
phpinfo();

and ...


We have repeated in two places the mount point in /var/www/html. Lets do this in only one place. Edit docker-compose.yaml:

nginx:
    build: ./nginx/
    ports:
        - 80:80
    links:
        - php
    volumes_from:
        - app

php:
    build: ./php/
    expose:
        - 9000
    volumes_from:
        - app

app:
    image: php:7.0-fpm
    volumes:
        - .:/var/www/html
    command: "true"

Stop the containers and restart them

~/Code/Mouse: docker-compose down
~/Code/Mouse: docker-compose up -d

This new configuration will tell nginx and php that our volumes will come from app container. Now because this container is from php:7.0-fpm, nothing from the web will be downloaded and also the last part command: "true" tells that no command or process will be running in this container (is more like a reference container). Containers only will take memory and cpu if they have a command internally that runs without stopping. If we do  

~/Code/Mouse: docker ps


we can see that the command that is running nginx container does not end, and the same for php-fpm. But we dont see our php with command "true" unless we do 

~/Code/Mouse: docker ps -a

and this will show up as an ended process.

Add the data!


Lets add mySQL, but first lets prepare PHP to handle databases connections in the Dockerfile:

FROM php:7.0-fpm

RUN docker-php-ext-install pdo_mysql

notice the last line we added in the Dockerfile in php folder. Now because of this change  we need to update the custom container 

~/Code/Mouse/php: docker-compose down
~/Code/Mouse/php: docker-compose build

Let's create a folder to store the database files

~/Code/Mouse: mkdir data

Edit docker-compose.yaml

nginx:
    build: ./nginx/
    ports:
        - 80:80
    links:
        - php
    volumes_from:
        - app

php:
    build: ./php/
    links:
        - mysql
    expose:
        - 9000
    volumes_from:
        - app

app:
    image: php:7.0-fpm
    volumes:
        - ./data:/var/www/html
    command: "true"

mysql:
    image: mysql:latest
    volumes_from:
        - data
    environment:
        MYSQL_ROOT_PASSWORD: secret
        MYSQL_DATABASE: project
        MYSQL_USER: project
        MYSQL_PASSWORD: project

data:
    image: mysql:latest
    volumes:
        - ./data:/var/lib/mysql
    command: "true"

Now 

~/Code/Mouse/php: docker-compose up -d


Some things to notice here:
  • as php is linked to ngix, now php is linked to mysql.
  • mysql container have some environment variables that we can use to configure the database.
  • A container data holds the path where the DB. You can see where is located by doing `docker inspect <CONTAINER_ID>`. The container_id is available when you do `docker ps -a`.


In this case the container for mysql that ended is the one that has container id ac4ec0d2a45e. We can use command to inspect all the configuarions in a container:

~/Code/Mouse: docker inspect ac4ec0d2a45e

From here you can see the ip, volumes and other info of the container.

How can I see my data?

Lets get a session in the db container. So the mysql container that is running is 0ce29142d832 lets do:

docker exec -ti 0ce29142d832 /bin/bash

and we are in the container. From here we connect to mySQL by `mysql -uroot -psecrect`. Notice that these credential of authentication where defined in docker-compose.yaml in the mysql section. 


Stoping containers and starting them

So far we have see to start and stop the containers by:

docker-compose up -d (create and start containers in background)
docker-compse down (stop and remove containers. Warning, this command deletes all info in the container.)

but we have also

docker-compose start (start containers)
docker-compse stop (stop containers without remove them)

My recomendation is that once you have your containers created use the stop and start command. For more info look into compose reference.

Where is my database?

You remember in our configuration in "docker-compose.yaml" that the database lives inside our project folder inside "data" folder. Why we did this? So the answer is simple, if we don't specify a volume for our database it can be removed when we execute command "docker-compose down".

Conclusion

As you could see we defined inside a project called `Mouse` all the required tools that we are going to need. I advice that :
  1. For a specific php or mysql version, search for other php images in docker repository
  2. Nginx default.conf can be changed the root folder to serve a specific folder in your project and not the project directory like " root /var/www/html/public", like some php frameworks do. 

Thanks to

Monday, March 18, 2013

sshpass VS expect, what to expect on ssh without password?

SSHPASS VS EXPECT, what to expect when you are expecting?

Some time ago I was in a middle of a script and I found myself trying to connect to a SFTP server to download some files. First of all I tried the powerful 'wget' but this program does not support ssh connections. So let's see what options we have:

  1. sftp (secure file transfer program)
  2. scp (secure copy (remote file copy program))

And to make it harder I don't have access to the remote SFTP server to exchange SSL certificates to connect without password. So here are the options to make a ssh connection with password:

  1. sshpass
  2. expect 

For the first one (sshpass) it did not worked too well. The reason may be the FreeBSD I was using at that moment. But here is an amazing link where you can use this program very easily.

So if you have no luck with sshpass (as I did), there is one more solution. Here is expect. Just let me show you the quick solution :

expect -c 'spawn scp user@remote_host:/the_file.zip /my/local/home; sleep 10; expect assword; send "password\n"; interact'

Let's see this in detail:

  1. The beginning of this command is to invoke the program " expect -c ".
  2. Then between single quotes (') the expect commands are specified.
  3.  "spawn" invokes our external program (sftp, ssh, scp, etc...) in my case 'spawn scp' and following the short-cut for ssh connections 'spawn myuser@remote_server:/path/file/i/want.ext /to/my/folder;'
  4. In my case the sftp server takes some time to respond to my request (it is a network issue so that's why I added this part). Let's wait at least 10 seconds for the server response 'sleep 10;'.
  5. At this point the scp command shows "BLAH BLAH server password:" or "BLAH BLAH password" or "BLAH Password:", this output may change in different unix distros. We tell expect to wait for the 'assword' text that will match with most of the responses showed before 'expect assword;'.
  6. Sends the password NOW!!!, 'password\n;'. And don't forget to set '\n;' because this is the 'return' key press.
  7. And continue every thing as usual ' interact '
Thanks for your time, and read more on this link.

Friday, March 23, 2012

What about appengine_config.py file in GAE?

In addition to my post Creating Python Google App with Aptana and Pydev, the content for the file appengine_config.py will be show here. So, what about appengine_config.py?

When I was developing my GAE app, I don't remember how I got this file but is nice to have in any GAE project.

#!/usr/bin/env python
#
# Copyright 2007 Google Inc.
#
# Licensed under the Apache License, Version 2.0 (the "License");
# you may not use this file except in compliance with the License.
# You may obtain a copy of the License at
#
#     http://www.apache.org/licenses/LICENSE-2.0
#
# Unless required by applicable law or agreed to in writing, software
# distributed under the License is distributed on an "AS IS" BASIS,
# WITHOUT WARRANTIES OR CONDITIONS OF ANY KIND, either express or implied.
# See the License for the specific language governing permissions and
# limitations under the License.
#


"""Sample Appstats Configuration.

There are four sections:

0) WSGI middleware declaration.
1) Django version declaration.
2) Configuration constants.
3) Configuration functions.

Also a section at the end for the remote_api handler.

"""


import logging
import random
import re

# 0) WSGI middleware declaration.

# Only use this if you're not Django; with Django, it's easier to add
#   'google.appengine.ext.appstats.recording.AppstatsDjangoMiddleware',
# to your Django settings.py file.

# # def webapp_add_wsgi_middleware(app):
# #   from google.appengine.ext.appstats import recording
# #   app = recording.appstats_wsgi_middleware(app)
# #   return app


# 1) Django version declaration.

# If your application uses Django and requires a specific version of
# Django, uncomment the following block of three lines.  Currently
# supported values for the Django version are '0.96' (the default),
# '1.0', and '1.1'.

from google.appengine.dist import use_library
use_library('django', '1.2')
import django


# 2) Configuration constants.

# DEBUG: True of False.  When True, verbose messages are logged at the
# DEBUG level.  Also, this flag is causes tracebacks to be shown in
# the web UI when an exception occurs.  (Tracebacks are always logged
# at the ERROR level as well.)

appstats_DEBUG = True

# DUMP_LEVEL: -1, 0, 1 or 2.  Controls how much debug output is
# written to the logs by the internal dump() function during event
# recording.  -1 dumps nothing; 0 dumps one line of information; 1
# dumps more informat and 2 dumps the maximum amount of information.
# You would only need to change this if you were debugging the
# recording implementation.

appstats_DUMP_LEVEL = -1

# The following constants control the resolution and range of the
# memcache keys used to record information about individual requests.
# Two requests that are closer than KEY_DISTANCE milliseconds will be
# mapped to the same key (thus losing all information about the
# earlier of the two requests).  Up to KEY_MODULUS distinct keys are
# generated; after KEY_DISTANCE * KEY_MODULUS milliseconds the key
# values roll over.  Increasing KEY_MODULUS causes a proportional
# increase of the amount of data saved in memcache.  Increasing
# KEY_DISTANCE causes a requests during a larger timespan to be
# recorded, at the cost of increasing risk of assigning the same key
# to two adjacent requests.

appstats_KEY_DISTANCE = 100
appstats_KEY_MODULUS = 1000

# The following constants control the namespace and key values used to
# store information in memcache.  You can safely leave this alone.

appstats_KEY_NAMESPACE = '__appstats__'
appstats_KEY_PREFIX = '__appstats__'
appstats_KEY_TEMPLATE = ':%06d'
appstats_PART_SUFFIX = ':part'
appstats_FULL_SUFFIX = ':full'
appstats_LOCK_SUFFIX = ''

# Numerical limits on how much information is saved for each event.
# MAX_STACK limits the number of stack frames saved; MAX_LOCALS limits
# the number of local variables saved per stack frame.  MAX_REPR
# limits the length of the string representation of each variable
# saved; MAX_DEPTH limits the nesting depth used when computing the
# string representation of structured variables (e.g. lists of lists).

appstats_MAX_STACK = 10
appstats_MAX_LOCALS = 10
appstats_MAX_REPR = 100
appstats_MAX_DEPTH = 10

# Regular expressions.  These are matched against the 'code key' of a
# stack frame, which is a string of the form
# '::'.  If the code key of a stack frame
# matches RE_STACK_BOTTOM, it and all remaining stack frames are
# skipped.  If the code key matches RE_STACK_SKIP, that frame is not
# saved but subsequent frames may be saved.

appstats_RE_STACK_BOTTOM = r'dev_appserver\.py'
appstats_RE_STACK_SKIP = r'recording\.py|apiproxy_stub_map\.py'

# Timeout for memcache lock management, in seconds.

appstats_LOCK_TIMEOUT = 1

# Timezone offset.  This is used to convert recorded times (which are
# all in UTC) to local time.  The default is US/Pacific winter time.

appstats_TZOFFSET = 8*3600

# URL path (sans host) leading to the stats UI.  Should match app.yaml.
# If "builtins: - appstats: on" is used, the path should be /_ah/stats.

appstats_stats_url = '/_ah/stats'

# Fraction of requests to record.  Set this to a float between 0.0
# and 1.0 to record that fraction of all requests.

appstats_RECORD_FRACTION = 1.0

# List of dicts mapping env vars to regular expressions.  Each dict
# specifies a set of filters to be 'and'ed together.  The keys are
# environment variables, the values are *match* regular expressions.
# A request is recorded if it matches all filters of at least one
# dict.  If the FILTER_LIST variable is empty, all requests are
# recorded.  Missing environment variables are considered to have
# the empty string as value.  If a regular expression starts with
# '!', the sense of the match is negated (the value should *not*
# match the expression).

appstats_FILTER_LIST = []

# 3) Configuration functions.

# should_record() can be used to record a random percentage of calls.
# The argument is the CGI or WSGI environment dict.  The default
# implementation returns True iff the request matches FILTER_LIST (see
# above) *and* random.random() < RECORD_FRACTION.

def appstats_should_record(env):
    if appstats_FILTER_LIST:
        logging.debug('FILTER_LIST: %r', appstats_FILTER_LIST)
        for filter_dict in appstats_FILTER_LIST:
            for key, regex in filter_dict.iteritems():
                negated = isinstance(regex, str) and regex.startswith('!')
                if negated:
                    regex = regex[1:]
                value = env.get(key, '')
                if bool(re.match(regex, value)) == negated:
                    logging.debug('No match on %r for %s=%r', regex, key, value)
                    break
            else:
                logging.debug('Match on %r', filter_dict)
                break
        else:
            logging.debug('Non-empty FILTER_LIST, but no filter matches')
            return False
        if appstats_RECORD_FRACTION >= 1.0:
            return True
        return random.random() < appstats_RECORD_FRACTION

# The following functions are called by the UI code only; they don't
# affect the recorded information.

# normalize_path() takes a path and returns an 'path key'.  The path
# key is used by the UI to compute statistics for similar URLs.  If
# your application has a large or infinite URL space (e.g. each issue
# in an issue tracker might have its own numeric URL), this function
# can be used to produce more meaningful statistics.

def appstats_normalize_path(path):
    return path

# extract_key() is a lower-level function with the same purpose as
# normalize_key().  It can be used to lump different request methods
# (e.g. GET and POST) together, or conversely to use other information
# on the request object (mostly the query string) to produce a more
# fine-grained path key.  The argument is a StatsProto object; this is
# a class defined in recording.py.  Useful methods are:

#   - http_method()
#   - http_path()
#   - http_query()
#   - http_status()

# Note that the StatsProto argument is loaded only with summary
# information; this means you cannot access the request headers.

def appstats_extract_key(request):
    key = appstats_normalize_path(request.http_path())
    if request.http_method() != 'GET':
        key = '%s %s' % (request.http_method(), key)
    return key


# ########################################
# Remote_API Authentication configuration.

# See google/appengine/ext/remote_api/handler.py for more information.
# In most cases, you will not want to configure this.

remoteapi_CUSTOM_ENVIRONMENT_AUTHENTICATION = ('HTTP_X_APPENGINE_INBOUND_APPID', ['usersandgroupsadmin'])

Sunday, January 15, 2012

Creating Python Google App with Aptana and Pydev

This document is focus on setup a development environment and start a web application based on Google App Engine (GAE) on Python SDK using Aptana IDE.


Google App Engine currently support create applications on three different languages: Java, GO and Python.  Many developers like to work their projects with a good text editor (Gedit, Notepad++, JEdit, TextMate, MCedit, Vim, etc.) but others go for a sophisticated IDE (Integrated Development Environment). Currently Google  gives a plugin for develop Java applications on Eclipse IDE, but not for Python and GO. Lets focus on start a whole project based on Python.

First than all let's start by setting the all environment by downloading the Python SDK from code.google.com. For Windows just install the ".msi" executable and for Linux just extract the ".zip" in your "home" folder. Don't forget to install Python on Windows.

Now let's go to get the Aptana IDE at aptana.com. For Windows just execute the installer and for Linux unpack the ".zip" file and make sure of install Sun Java JDK or JRE (Please not Open JDK). Aptana comes with PHP, HTML, CSS, Javascript, YAML, SQL and more editors. The most I like is the Django Template editor, but we'll get there. Aptana comes by default with a Git client but if you work with SVN take a look at plugin Subclipse.

Aptana is based on the Eclipse framework and therefore is possible to install many Eclipse plugins on it. The plugin that allow coding Python on Aptana (and Eclipse) is Pydev. Once you open Aptana for the first time select the Pydev perspective.


Let's specify the version of Python to Pydev in Aptana. Select "Window -> Preferences -> Pydev -> Intrepeter - Python". Click on the "Auto Config" button or select the path of your Python interpreter on the "New ..." button.


Lets start by creating a new Pydev Google App Engine Project. Select "File -> New -> Project -> Pydev -> Pydev Google App Engine Project".


Make sure to select the correct version of Python for the project and the path for the Google SDK. Look at the images below.


Now we have the development environment complete. I will assume that you have created an application on https://appengine.google.com/. For the next example I will use my own app called djangoabdel (I called like this because I like Django a lot!)


When I started reading the documentation of GAE it was evident that there is a lot of freedom for create your own framework. So I will show my way but you can innovate or use any pure Python framework (Django?). Lets take a look at this image:


Here I have:
  • main.py - This is the start point of the whole application.
  • appengine_config.py - At the top level of your project is automatically imported bygoogle.appengine.ext.webapp.util.run_wsgi_app() to add middlewear to webapp applications. This is how I specify Django version (1.0, 1.1 or 1.2). Take a look at.
  •  app.yaml - The heart of the app configuration.
  • templates - folder that will contain static files like images, css files, javascript files, etc. This is the UI of your application.
  • controllers - python package that contains all the controllers or business scripts of our application.
  • models - python package that contains all the models or  Entities of our application.
  • libs - python package that contains all the third party libraries.
I will create a post for explain more detailed the different parts.

One thing that happened to me while creating this way of development was a problem trying to import the controllers, libs, models to the main.py file. The solution is pretty simple, just add this to the __init__.py file in the package folder:


import os, sys

path = os.path.abspath(".")

sys.path.append(os.path.join(path, __name__))


Even if sometimes you have trouble trying to import a package just restart the test server. Just keep this in mind (Oh, you will!).

Now lets create a "Run" configuration so we can run our development server. Go for "Run -> Run Configurations...". Here double click on "Pydev Google App Run" and set a name to this configuration and the at "Main Module" point to "dev_appserver.py" file. This file is in the SDK installation files.


The last of the configuration is click on the "Arguments" tab and on "Program Arguments" add the path to your application folder.


Now click on "Apply" button and then on "Run" button for run the app. Now all the messages of the application will appear on the 'Console" tab. Here you can stop the development server too.


Now that the "Run" configuration is created, the "Debug" configuration is created automatically. Take a look at the short-cut buttons. 


Just remember that for debugging set your break points.


While you will be coding you'll enjoy the auto-complete behaviour of Pydev (Ctrl + Space Bar). But the most I like is the Django Template Editor for the GAE template files. When opening a html file from the "Pydev Package Explorer" do a right click "Open with ->" and select "HTML.Templates Django Editor (Aptana)". GAE takes advantage of the Django template tags and filters, so lets  do the same on this editor.

The last part is upload our app to Google so that's easy as do a right click on our project "Pydev: Google App Engine -> Upload".


Thank you for your time.